Migrating Fund Data from PowerFAIDS Desktop
Starting with Release 27.2, PowerFAIDS Desktop now includes an easy-to-use fund migration process for transferring data related to funds into PowerFAIDS Cloud. The process generates a CSV file which is preconfigured for upload into the PowerFAIDS Cloud fund import. This process can be run multiple times to test data migration.
Caution: Pay close attention when importing the file into your production instance of PowerFAIDS Cloud. If you have changed the names of funds after importing them into PowerFAIDS Cloud you will end up with duplicate funds.

Enable PowerFAIDS Cloud data migration in PowerFAIDS Desktop
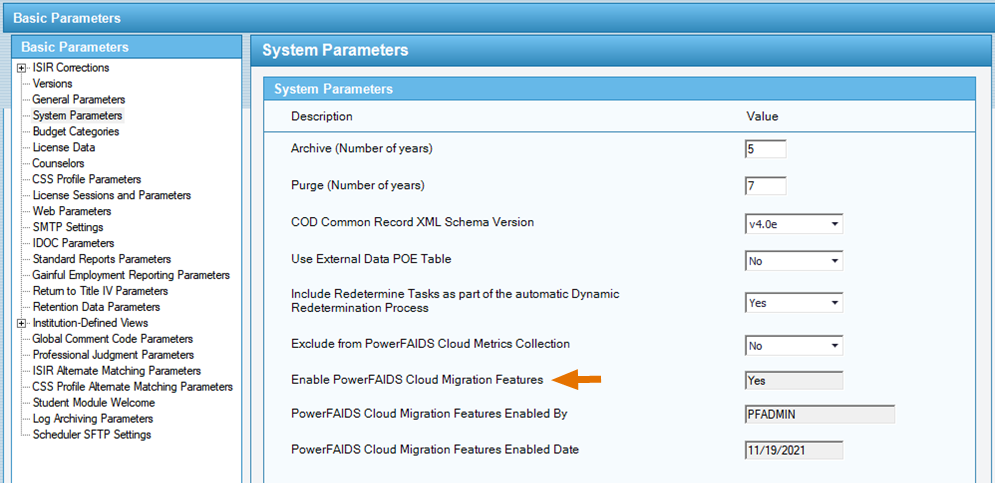
- In PowerFAIDS Desktop version 27.2 or higher, open the Administration module and from the View menu navigate to Campus Info > Basic Parameters > System Parameters.
- Change the Enable PowerFAIDS Cloud Migration Features field to Yes and save.
PowerFAIDS Desktop will warn you that turning on migration features will disable Parm Roll and can only be undone by contacting PowerFAIDS Support.

Exclude funds you do not want to migrate
By default, the migration export includes all active non-federal funds. You can exclude funds from the export that you no longer use by setting them to inactive in PowerFAIDS Desktop.
Tip: If you are still using a fund in PowerFAIDS Desktop and don’t want it migrated, you can delete the fund from the CSV file before it’s imported into PowerFAIDS Cloud.
-
In PowerFAIDS Desktop, open the Administration module and ensure you are logged into the latest award year.
-
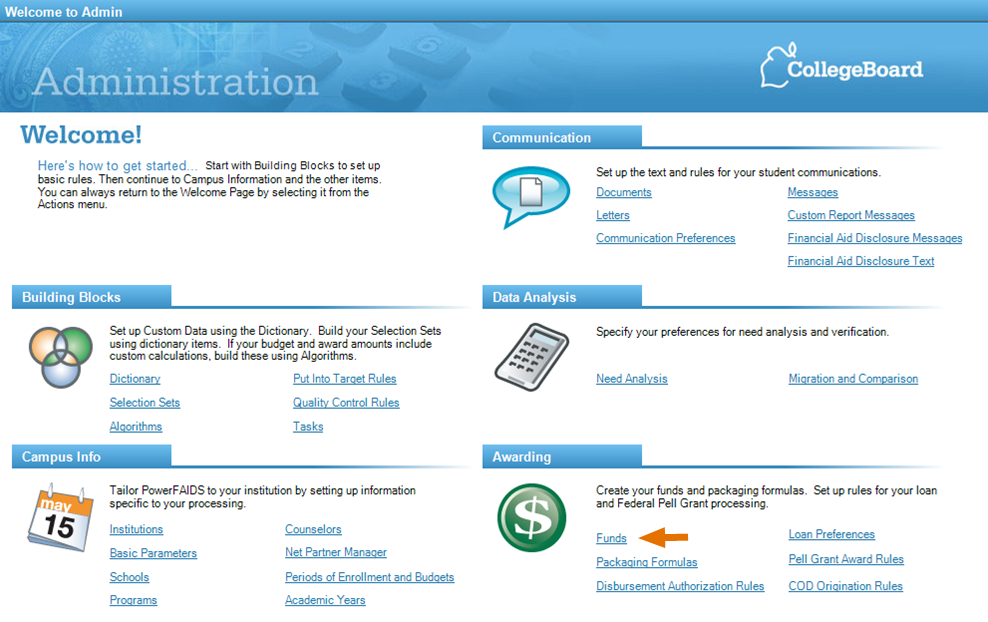
From the Welcome page, select Funds.
- For each fund that you don’t want migrated to PowerFAIDS Cloud, set the Active Fund field to No and click Save.
Note: You won’t be able to set the Active Fund field to No for funds that have been awarded in the current award year. Take note of those funds and delete them from the CSV file before importing into PowerFAIDS Cloud.

Export the fund migration file from PowerFAIDS Desktop
-
In PowerFAIDS Desktop, open the Data Integration module and ensure you are logged into the latest award year.
-
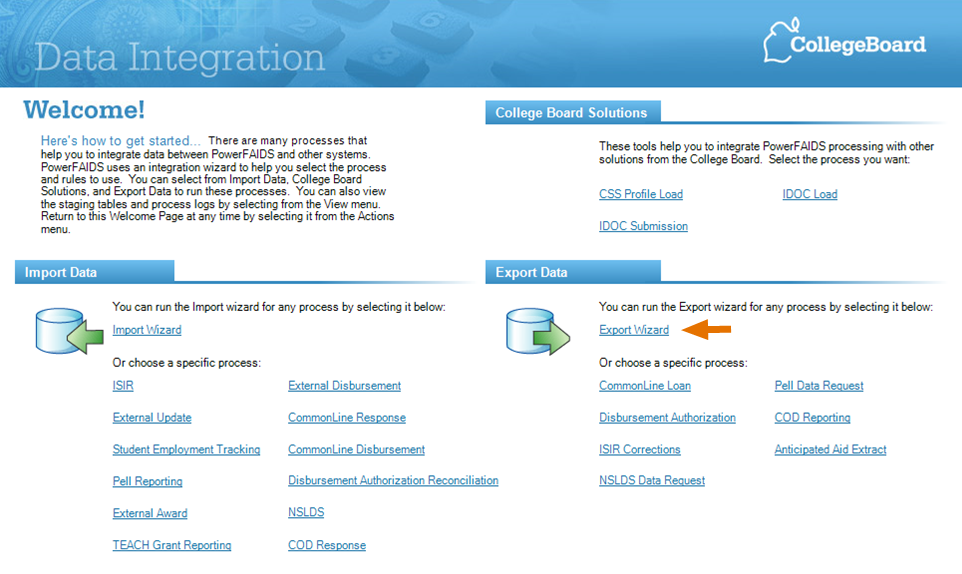
From the Welcome page, select Export Wizard.
-
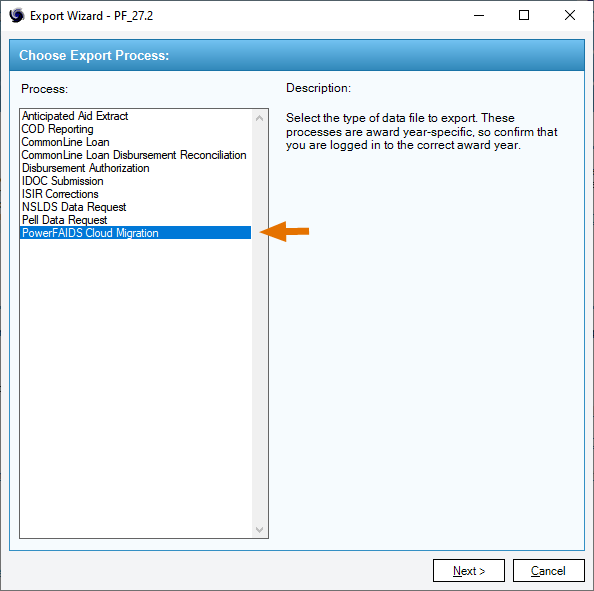
From the Export Wizard window, select the PowerFAIDS Cloud Migration option and click Next.
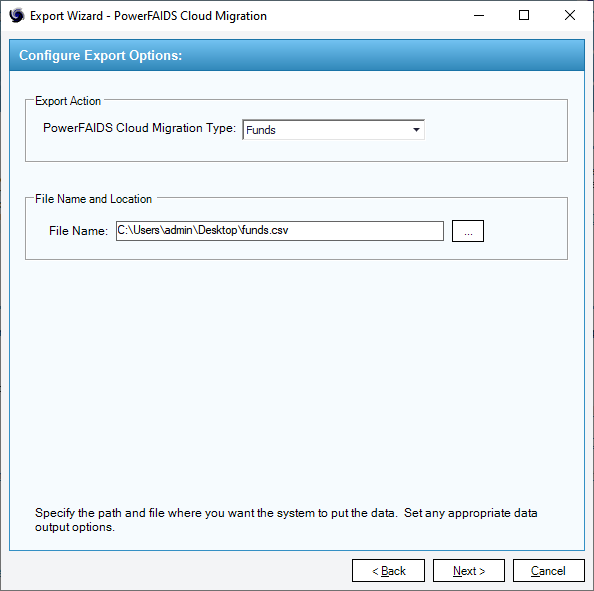
- For the PowerFAIDS Cloud Migration Type, select Funds, then select the file name and location to save the export and click Next.
-
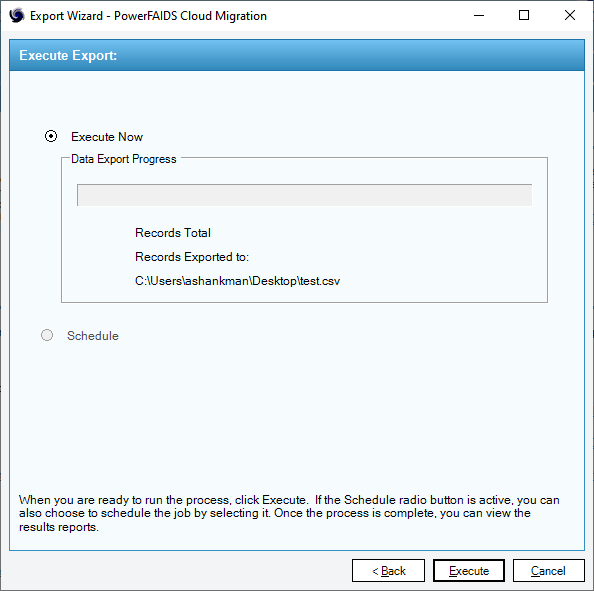
Click Execute.
The exported file can optionally be reviewed in Excel before importing into PowerFAIDS Cloud.
Tip: Remember to open the CSV file and delete rows for funds that you don’t want created in PowerFAIDS Cloud before moving on to the next step. This includes funds you could not mark as inactive in PowerFAIDS Desktop because they are still used in the current award year.

Import the fund migration file into PowerFAIDS Cloud
- In PowerFAIDS Cloud, navigate to Import/Export > Historical Data > Fund Import.
- Click Upload, select the file exported from PowerFAIDS Desktop, and click Open.
- Once the file scan is complete (see Status column), select the file and click Import.
- Optionally, click Results Report > View Report for the most recent import to view the import results.
